Why trace your pattern? Why not just use the tissue?
There are several good reasons to trace your pattern pieces rather than cutting into your tissue.
Pattern tracing paper is stronger and more durable than pattern tissue paper. If you’re planning to possibly make more than one version, the tissue paper may not stand up to multiple uses.
Many pattern tracing papers are durable enough to be pin or thread basted together to check basic fit. Tissue paper is definitely not.
Patterns are drafted to the designer’s “block”, their standard body size and type. I’m not standard, and I’m sure you’re not either! A pattern rarely fits perfectly straight out of the envelope. Pattern tracing paper makes it easier to grade between sizes, and make all the other alterations you may need for a perfect fit. You can cut, slash, spread, tape and fold it easily.
Pattern tracing paper is perfect for making notes that you are guaranteed to see next time you make the garment! You can note any adjustments you’ve made, the date you made the garment, and even what fabric, stitch length and thread type you’ve used.
Pattern tracing paper allows you to trace all the views and variations of a pattern, and allows you to make the garment for someone else in a different size.
Tracing a Pattern
Now that you're convinced, to trace a pattern you will need:
- The pattern you want to trace
- Tracing paper. We recommend Pattern Trace Swedish tracing paper because it is durable, can be sewn and ironed for tissue fitting, can be written on, and stands up to pattern alterations well. You can also use parchment paper for smaller pattern pieces, Celestra (available from home decor fabric stores, it's the stuff that's stapled on the bottom of couches and chairs to keep the cat away from the springs) or examination table paper (available from medical supply stores or nail salon supply stores.)
- Straight edge and pencil or pen
- Pattern weights or other items to weigh down your tracing paper and keep it in place while tracing. I've used coffee cups, scissors, children's wooden blocks, cans of tuna, rocks, and occasionally actual pattern weights.
Here's what to do:
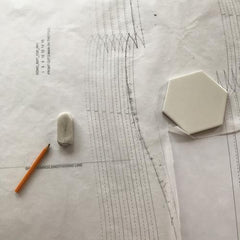
To get an accurately traced pattern, start by making sure the pattern tissue itself lays nice and flat. If it’s crumpled, give it a press with a cool, dry iron to smooth it out.
Lay out your pattern on a large flat surface. Your surface doesn't have to be big enough for the entire pattern, but it should be big enough that each single piece doesn't hang over the edge.
If you’re using a multi-sized pattern, or grading between sizes, you might find it useful to highlight your size first to help you see which lines to trace. Go over the lines in a coloured pen, and don’t forget the markings such as notches, grainline arrows and gather points too.
Lay your tracing paper on top, and secure everything down with weights. Avoid using pins for this step as they can make the paper rise up a little and thus change the shape that you’re tracing.
Trace around the outline of the pattern piece. Use a pencil and a straight edge as required to guide the tracing, and choose the size line you need using the key given on the pattern. For curves and when grading, a French Curve is helpful to get a smooth curve.
Be sure to add in ALL the markings. You don’t want to have to go back to your original pattern sheet once you’ve put it away because you forgot to add an important marking. Markings include:
- Grainlines - The grainline arrow is one of the most critical pieces of information on a pattern piece
- Notches – Notches are used to distinguish between the front and back edges of a sleeve, and to correctly match seams.
- Gather points – The points where you will start and stop gather stitching
- Darts – Mark the dart tip and both dart legs, then use a ruler to join them.
- Cutting and hemlines
- Placement dots, and
- Pocket placement marks
Check the paper hasn’t shifted and that all your dots and markings are in the right place. Once you’re happy that your lines are accurate, you can go over them in a pen if you like – a finer pen will keep the pattern more accurate.
Finally, label your pattern pieces so when you find them a few months down the line under a pile of random stuff, you know what they are and how to use them! Write on each piece:
- The name of the pattern, for example Cielo Dress,
- The name of the piece, for example Top Front,
- The size, for example "Size 12 bust, Size 14 Waist, Size 16 Hip" (my usual!),
- Any fitting or design changes you’ve made to it, such as "lengthened torso 1 inch, lengthened hem 5 inches (also my usual) ,
- How many pieces to cut (such as “cut one on fold” or “cut two of fabric and two of interfacing”) and any interfacing pieces you need to cut from it.
- The month and year, so if you come back to the pattern a year or so later, you'll know whether you need to check the fit before sewing.
Now your pattern pieces are ready to use!